> ## Documentation Index
> Fetch the complete documentation index at: https://docs.daven.ai/llms.txt
> Use this file to discover all available pages before exploring further.
# Cine Sequence
**🎬 Daven AI – Cine Sequence usage guide**
**You can find the app here.** [https://daven.ai/apps](https://daven.ai/apps)
## 1. Upload reference image
* First upload one main reference image that will be the basis of the sequence.
\_You can also upload \_ \\\*up to 10 additional reference images\\\*\\\* if needed.
* The main image defines the world, characters, space, and mood of the whole sequence.
## 2. Cine Sequence overview
* \* Cine Sequence takes one main image and,
*based on your chosen \\* \\\*sequence type (concept)\\\*\\\*,
\\\*automatically generates a cinematic sequence of 9 scenes (Scene)\\\*\\\*.
* \* Each sequence is like a storyboard: one scene split into 9 panels.
## 3. Using reference images & text prompt (important)
* Besides the main reference image you can add:
Additional reference images
Text prompt (custom prompt)
* In that case Cine Sequence:
Keeps the composition, characters, mood, and world of the main image
and incorporates the extra images and text
to extend into 9 sequence scenes that match the chosen concept.
So:
Base image \\+ extra references \\+ text direction \\=
A narrative 9-panel cinematic sequence built from your image
## 4. Sequence type (10 options)
* Joyful Sequence
* War/Duel Sequence
* Calm/Peaceful Sequence
* Dance/Rhythm Sequence
* Farewell Sequence
* Dialogue Sequence
* Revelation Sequence
* Release Sequence
* Memory Sequence
* Commerce Sequence
* Intense Action Sequence
Each type has different scene progression and emotional curve.
## 5. Output settings
* Aspect ratio (e.g. 16:9, 1:1)
* Resolution (e.g. 1K)
* Output mode:
🟦 **Grid (single image)**: 3×3 layout; all 9 scenes in one image
🟩 **9 separate frames**: Each scene as its own image (9 images)
## 6. Using Grid mode
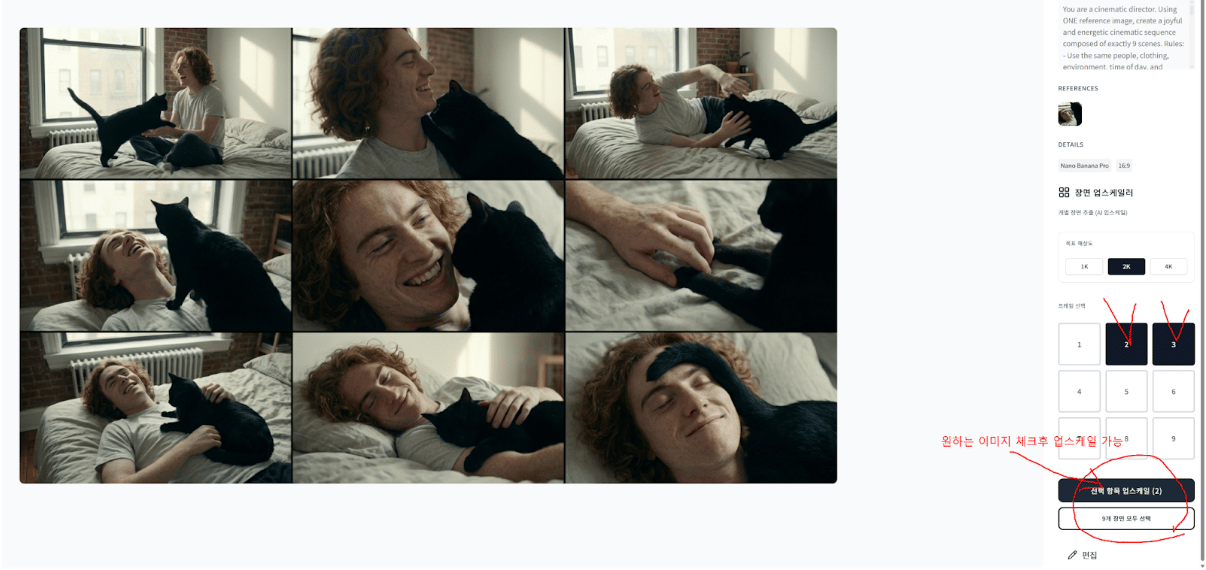
* After choosing a sequence, generate in \\\[Grid\\] mode:
3×3 \\= 9 panels in one image.
* In the result you can:
Select a panel by number and upscale it.
* ⚠️ Note:
Grid output is small panels upscaled, so
upscaling may reduce resolution and detail.
## 7. 9 separate frames mode (recommended)
* With \\\[9 separate frames\\] mode:
Each sequence scene is generated as its own image from the start (9 images).
* Benefits:
Each panel has full resolution
Better quality without upscaling
Better for storyboards, continuity, and cinematic planning
## 8. Workflow summary
1. Upload main reference image
2. (Optional) Upload extra reference images
3. (Optional) Enter text prompt
4. Choose sequence type
5. Set aspect ratio / resolution
6. Choose output mode (Grid or 9 separate frames)
7. Click Generate
8. Review result and (if needed) select panel(s) / upscale
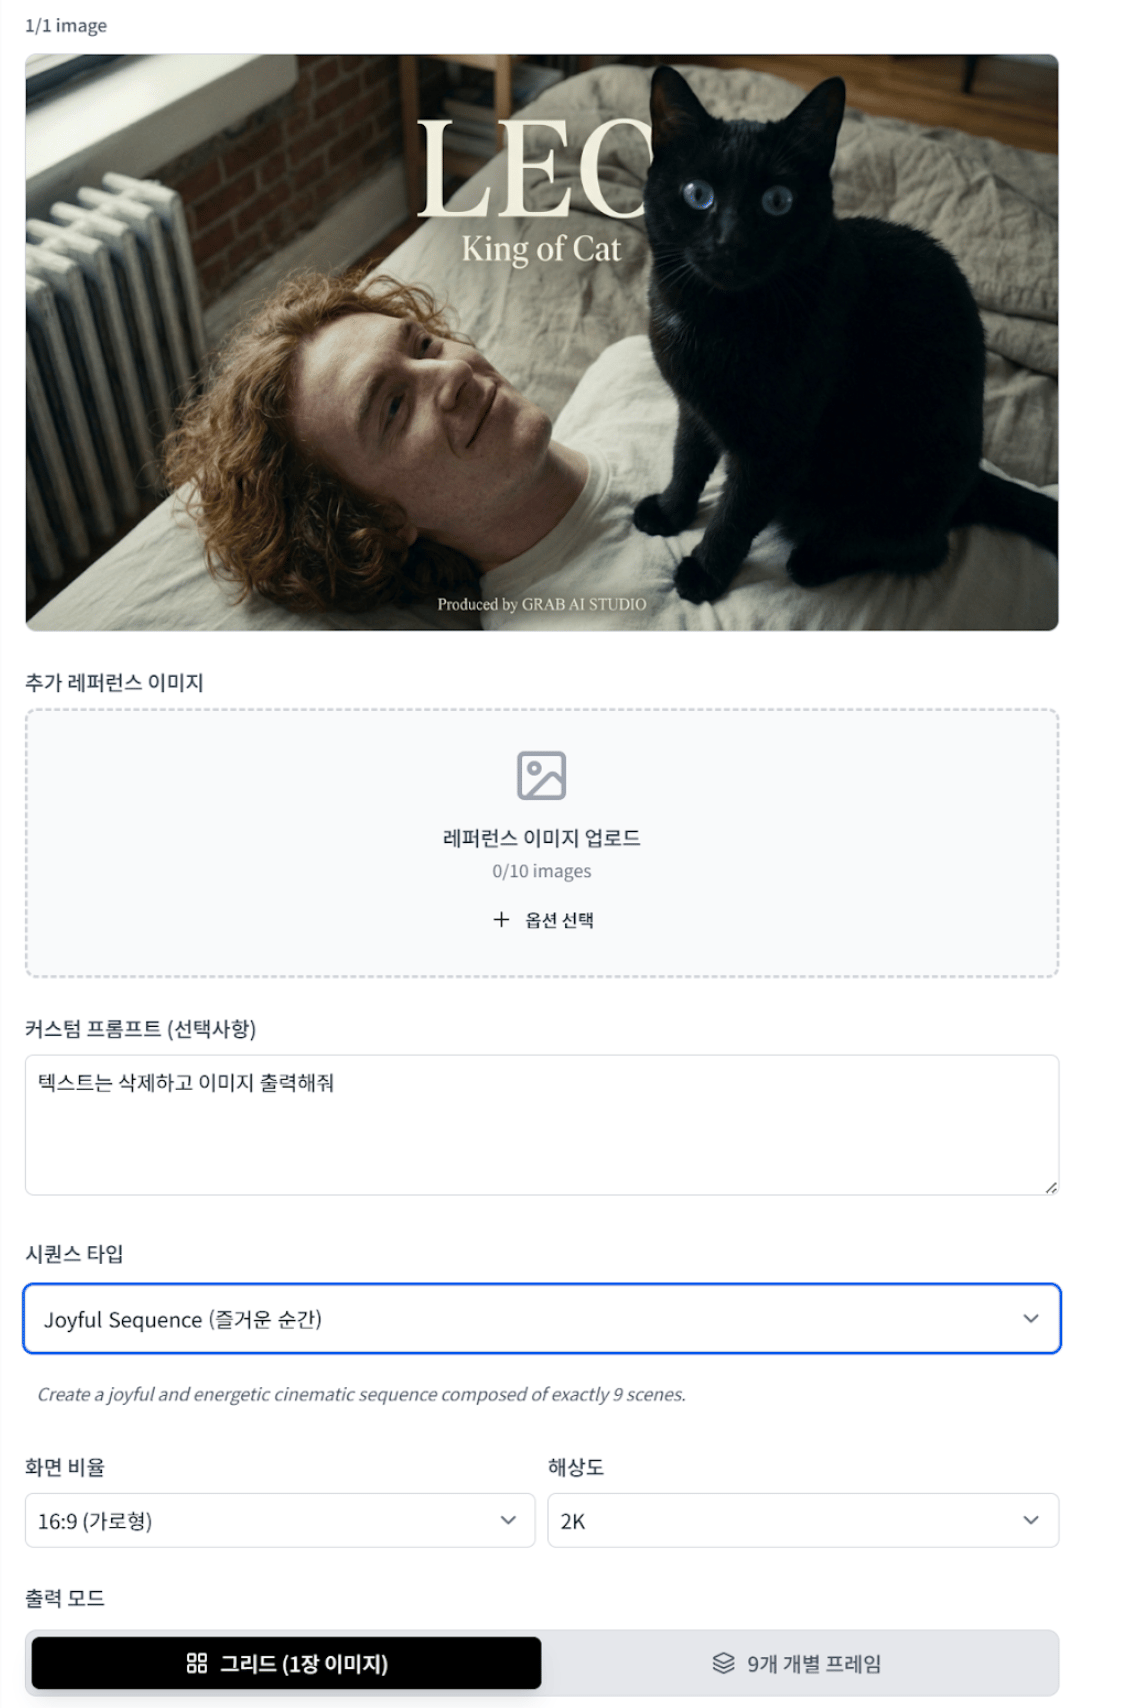
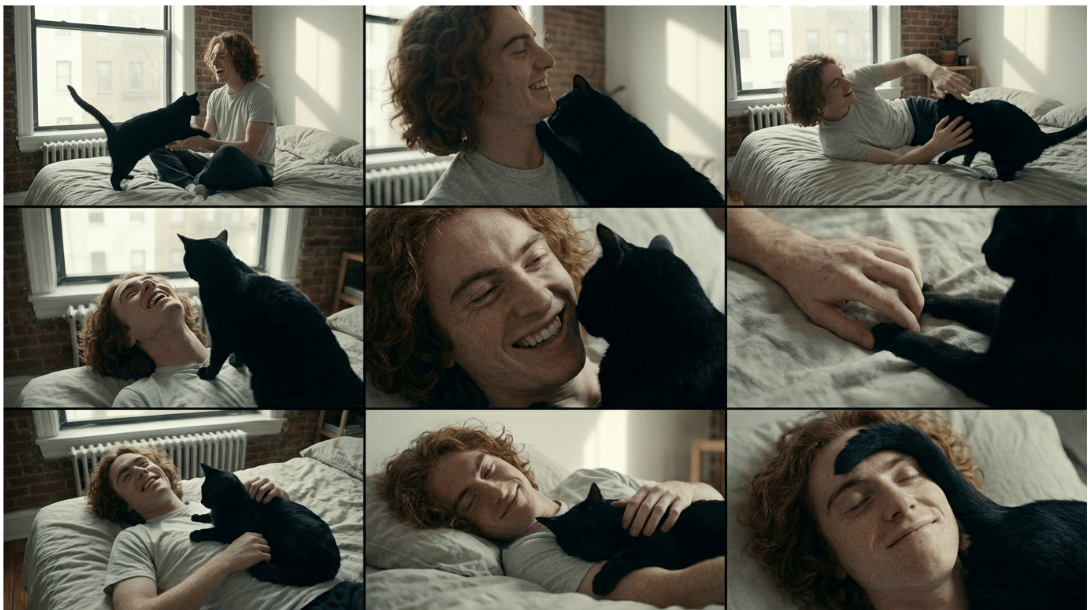 Sequence generated after "removing text" from the original image
* Request image generation after entering "remove text from image" in the text box
Sequence generated after "removing text" from the original image
* Request image generation after entering "remove text from image" in the text box
 **✨ Summary in one line**
Cine Sequence combines one base image with extra images and text direction to automatically create a 9-panel cinematic scene sequence that matches your chosen concept. For best quality in practice, use **9 separate frames** mode.
**✨ Summary in one line**
Cine Sequence combines one base image with extra images and text direction to automatically create a 9-panel cinematic scene sequence that matches your chosen concept. For best quality in practice, use **9 separate frames** mode.